Our list of the best Raspberry Pi projects celebrates just a snapshot of the ingenuity and creativity that that the DIY computing community has to offer. Whether its building home automation, security systems, tools for photography, drone technology, or even basic tasks for getting into the hobby, there's something for every type hobbyist.
Through this nifty gadget, you’ll be able to learn the building blocks of coding, and from there use it as a jumping-off point for an understanding of a wide range of technologies. Topics that can be learned through a Raspberry Pi include cyber security, network tricks and even sophisticated imaging technology.
There are plenty of projects to choose from and many users have used the Raspberry Pi to explore software development, robotics, and even the dark path towards hacking. You’ll be pleased to know that the device is reasonably cheap, small, and extremely portable, so it will be great for a whole range of tasks.
Additionally, it’s very easy to get yourself set up with this device, although you will need to get to grips with Raspberry Pi's operating system Raspbian.
Create a portable security box
The portability and affordability of the Pi have made it a popular tool for red teamers (people paid to break into security systems), penetration testers and other security personnel. Because it has a built-in Ethernet port, minimal power requirements and the ability to run any Linux software, it proves ideal for sneakily integrating with target networks.
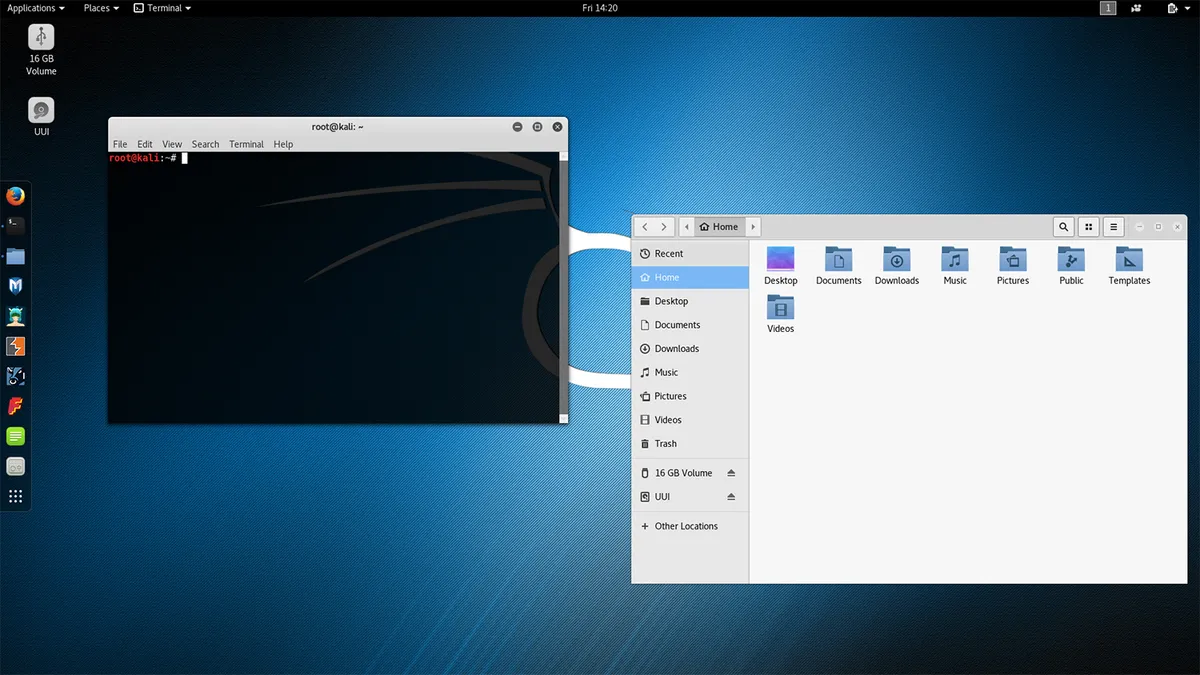
The software of choice for security operatives aiming to use the Pi in this manner is Kali, a Linux distro that's specifically built for hacking tasks. There's a purpose-built version of Kali for the Raspberry Pi, and installing it is easy by following these steps.
Once you've got Kali installed, not only can you use it in your security operations, you can also use it as a safe space to play around with new tools without risking damage to your primary machine - although, as always, you should only be hacking targets that have given you express permission.
Network performance monitor

Best practices to deploy sustainable and resilient data centers at scale at the network edge
Data center owners and operators must elevate sustainability to a core value
As we work from home more frequently, it is more important than ever to be able to troubleshoot network issues. You don’t want internet outages now, and Reddit user 'Mr Canoehead' has a Raspberry Pi project that can help.
This is a network performance monitor, built on top of a Raspberry Pi 3 B+. It's designed to monitor network activity and performance by using data to create a report with critical information. It measures network speeds and bandwidth, which makes it easier to track issues as they arise.
Mr Canoehead's system runs on five networks, two of which are configured as a transparent Ethernet bridge for monitoring bandwidth between a router and the internet service provider's modem. All network testing results and bandwidth readings are written to a database, which is updated daily. The system can be set up and left on site for a while to collect network performance data that can be analysed at a later date.
Run Windows 10 IoT Core on Raspberry Pi
Fancy running an internet of things (IoT) version of Windows 10 on your Raspberry Pi? With Windows 10 IoT Core, you can run a stripped-back version of the operating system on the microcomputer.
Although it would be great to run the full version of the operating system on the Raspberry Pi Model B+, it doesn't have the processing power with just a 1GB of RAM and a 1.4GHz ARM-based processor.
So enter Windows 10 IoT Core, a basic version of Microsoft's OS that has been designed for running on less powerful platforms. It's actually a lightweight IoT app that allows you to run a single UWP app at a time. You don't need a licence unless you want to commercialise your creations and only very limited equipment is needed: a Raspberry Pi 3 and a spare microSD card, plus a separate Windows computer with a microSD card reader. You'll also need Visual Studio, a text editor, the SDKs, add-ons, and certificates.
First, you'll need to set up the memory card for the Raspberry Pi you're using. You can make this easier with the New Out Of Box Software (NOOBS) installer. Create a bootable card from a Windows PC or laptop using Microsoft's IoT Dashboard app.
You can now set up the device using the Broadcom Raspberry Pi 2 & 3 option and OS build (Windows 10 IoT Core), then specify a password, choose a Wi-Fi network and install the OS onto the Raspberry Pi-compatible memory card.
Insert this into your Raspberry Pi and then you're ready to boot your device with the latest version of Windows IoT Core.
However, users should be aware that running Windows IoT on your Raspberry Pi can open you up to severe security risks.
Set up a thermal camera with a Raspberry Pi 4

Thermal, or infrared, camera setups are expensive. Tom Shaffner discovered this when he tried to figure out how well-insulated his home was. They can cost anywhere from a few hundred to a few thousand pounds - or almost £50 to rent one for a day. So, Tom decided to build his own.
After a bit of research, Tom found that it's possible to mount the relatively cheap MLX90640 thermal camera, manufactured by Pimoroni, onto a Raspberry Pi 4. Although it lacks a lot of the advanced features of an expensive device, the MLX90640 has a 24×32 resolution, giving each frame 768 different temperature readings and with a bit of image enlargement, the end result gets the job done nicely. Users can stream the video over a local wireless network and can hold the camera in one hand, with their phone in the other to use as a screen.
"You'll probably need a portable battery for the device and, if you're not going to stream the video over your Wi-Fi, you'll want a screen to attach to the Pi," Schaffner writes. "I went with the Wi-Fi option so I can't speak to screens, but I'd imagine any of the many Pi-specific screens would be fine for this."
His solution is partly based on several other projects that can be found on the Python library and the entire instruction set for the build and software setup can be found on GitHub. As an extra bonus, Schaffner also notes that the device could also be used as a security camera.
Learn cyber security skills with Raspberry Pi Pac-Man
Budding Pi enthusiasts and fans of retro arcade games can now learn basic cyber security skills with a Pac-Man-themed treasure hunt. By hacking your own Raspberry Pi, you can learn about running scripts and how malware works. The lessons are gained by getting Pac-Man to catch those pesky ghosts.
Given the mass switch to remote working and the need for more national cyber skills, a fun introduction to the basics could be a good way to train employees. To begin, you'll need a Raspberry Pi computer with an SD card and an internet connection. Your device will also need to be using the latest version of the Raspberry Pi's operating system, which includes the terminal.
The game is all about learning to navigate the terminal and protecting your computer. The 'ghosts' act as a virus and Pac-Man is essentially a protection tool. The aim is to hack the terminal, find the ghosts, similar to a treasure hunt. You will learn about placing each ghost in a safe directory where you can inspect their files as if they were real-life malware. Each one you collect and inspect will earn you points.
All the instructions can be found on the Raspberry Pi website, so head on over and get munching those ghosts.
Set up Raspberry Pi as a VPN server

Accelerate full-stack web and mobile app development
Three tips proven to help teams build modern apps faster
A virtual private network (VPN) allows you to mask your online identity so your activity can't be tracked as you browse the internet, download content or participate in conversations. VPNs can be used on regular computers too and the process is pretty much the same when using a micro-computer like Raspberry Pi.
But what takes this to the next level is using your Raspberry Pi as a VPN server, creating a personal VPN hotspot to stop information about your identity being passed on to any website used on your network. By installing a client on the Raspberry Pi, connect it to your router and it'll scramble your identity before it hits the external network.
To set your Raspberry Pi up as a VPN server, first install Raspbian to access the command line and then you can use the PiVPN script to install a VPN client to protect your communications. We recommend using OpenVPN as your VPN client, although it can be used with lots of others too. For more detailed instructions to set your Raspberry Pi up as a VPN server, you can follow the full guide.
Give Pi some facial recognition

This project uses a Raspberry Pi to carry out facial recognition. Using a camera module add-on and some code, you can quickly set up a Raspberry Pi to recognise someone's face. In this case, the developer used a number of images of his face and also those of actor Jeff Goldblum in Jurassic Park to train the system.
Unfortunately, this one isn't for beginners, as you need to have knowledge of coding, or at least some basic principles. You don’t need to have completed a computer science degree for this, however, as there are a number of coding bootcamps and tutorials that can teach core programming skills as an alternative. Fortunately, this project follows on from a tutorial on how to set up a facial recognition system using OpenCV, Python and deep learning.
More details on how to set this up can be found in this guide.
Build a proper desktop PC
While the Raspberry Pi technically has all the essential features of a desktop PC, there are a couple of issues that hold it back from being a truly credible option for those that want a general-purpose computer.

Thankfully, official Raspberry Pi distributor Element 14 has come to the rescue, announcing a kit that will transform your Raspberry Pi 3 into a proper, fully-capable desktop unit. The kit includes a snazzy-looking case, a heat sink and support for an mSATA SSD up to 1TB in size. It's available from Element 14 for just £40. You'll have to supply your own drive, though.
Virtual Desktop for Raspberry Pi
You can thank RealVNC's partnership with the Raspberry Pi foundation since it means the latest versions of the Raspbian distro all come with pre-installed versions of VNC Server and VNC Viewer.
You can use this to create a virtual desktop, which is great for providing a graphical desktop interface to Pis that wouldn't have had one otherwise, like headless devices running IoT or robotics projects.
In order to activate this, make sure the VNC Server is set up and enabled on the target Raspberry Pi. You can then use either your Raspberry Pi's terminal or an SSH connection to run the 'vncserver' command.
Make sure you note down the IP address and display number that the VNC Server displays and then insert that information into VNC Viewer. Now you should be able to remotely operate the Pi as if it had a full graphical desktop.
Raspberry Tor Router
Anonymising network The Onion Router (Tor) is beloved by privacy advocates everywhere, as well as dark web users with more nefarious purposes in mind.

This project turns the Raspberry Pi into a router to send all your network traffic through Tor, rather than just browser sessions. Best of all, you can even slap a battery pack into it to take it wherever you go.
Build your own password manager
After password manager LastPass was hacked, many users are looking for new products or solutions to store their passwords. This is why Novamostra’s portable password manager could be your next project to help you keep your precious passwords safe from attack.
The device is based on VaultWarden, a combination of the Raspberry Pi Zero and BitWarden, and you can carry it around with you everywhere you go. You simply need to plug the device into your PC where it will connect automatically.
From here, you can surf the web and your browser will be able to access the storage device for passwords, or you can head to a website and manage the passwords from there.
To build this, you’ll need a Raspberry Pi Zero, a tactile push button, a case if you want to protect the device, some screws, and an acrylic rod.
Monitor your internet connection

If you need an intuitive way to monitor your home or business internet connection, then this is the project for you. User bartsamnick at Autodeck Instructables put together an internet monitor. This makes use of a 7" Raspberry Pi touchscreen to display different metrics of your internet connection.
It’s able to display download and upload speed, automatically detect an ISP internet drop and cycle power to a modem, and can include an option to upload the speedtest data to Ubidots to keep a record of the data.
The project can provide users with a 24-hour and 30-day history of their download speeds if this needs to be scrutinised.
The equipment you’ll need to embark on this project includes a Raspberry Pi 4, a Raspberry Pi touchscreen monitor, a USB keyboard, and a computer fan.
Set up your own Wi-Fi extender with a Raspberry Pi
Looking for a cheap and easy way to boost your home Wi-Fi network? Then use your Raspberry Pi as a Wi-Fi extender with this guide from PiMyLifeUp. You’ll need two Wi-Fi adapters to get you started, as well as a Raspberry Pi, a microSD card, and a power supply.
However, be aware that the internet connection you receive might be a bit slower than what you’re used to as your internet connection will have to bounce from your router, to the booster, and then finally to your device. It probably isn’t a long-term solution for boosting your network, but it could be good to experiment with.
Expand your storage with your own NAS

You might find yourself downloading or backing up numerous files onto your home PC, and may soon discover that you’re running out of treasured space. This is where you might move these files to a hard drive. To make it easier to access the files, you might purchase a network-attached storage device, so you can access them over your local network. However, this can be a little pricey. The good news is that you’re now able to make your own NAS device with this guide from MagPi.
For this project, you’ll need at least two external USB drives, a USB 3.0 hub, gigabit Ethernet, and a UPS but this is optional.
You’ll have to decide how much storage you want before creating this, and buy the corresponding amount of external USB drives. The creators of this NAS guide also recommend using double the amount of hard drives you need, to provide extra protection to your NAS system. Make sure that the drives are compatible with USB 3.0 so you get the speed boost, since the Raspberry Pi 4 comes with this functionality.
Remember to always back up any data you store on this drive in case it fails, or you delete a file by accident. It could be worth using additional hard drives for this backup option, or even keeping your data in the cloud.