How to speed up Windows 10
Learn which Windows 10 services to disable to boost performance, plus other top tips
Windows 10 was the fastest, freshest operating system when it was released and for many it’s still the best operating system for their needs, despite the arrival of Windows 11.
However, even the best operating systems may end up feeling sluggish. Bloatware, a fragmented hard drive, or an overload of system services, to name a few, can all lead to a degraded Windows 10 experience.
Fortunately, there are some steps you can take to speed up Windows 10 once more, none of which require in-depth system knowledge to tweak. This includes disabling Windows services, which can quickly improve the performance of the operating system, as well as a number of other tricks to try.
Ten steps you can take to speed up Windows 10
We have provided ten steps below that should give your Windows 10 operating system a boost, although we can't guarantee that every step will work for every user. We have tried to cover simple steps that make use of the user-friendly menus offered by Windows, although there are a handful of steps that will require copying in strings of file text that can make things a bit more complicated.
We will cover the following steps in more detail:
- Windows 10 services to disable to speed up the OS
- Disabling startup programs
- Speeding up the Windows 10 Start menu
- Speeding up a slow Windows login
- Making Windows shut down faster
- Getting rid of bloatware in Windows 10
- Turning on Windows 10 fast-startup
- Cleaning up your Windows 10 disk
- Defragging the hard drive on Windows 10
- Migrating Windows to an SSD
1. Windows 10 services to disable to speed up the OS
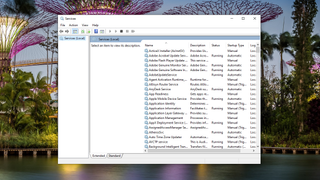
As with all versions of Windows, working in the background are services. While some of them are vital to smooth running, quite a few aren't for day-to-day use. If you disable these services, you can speed up Windows 10.
To turn off services in windows:
- Click the Start Menu
- Type services.msc into the search field
- Open the Services app
- Find a service you want to disable, and double click
- Click stop
There are quite a few Windows 10 services to disable if you want to get the full effect, although how you use your system will influence your decision. Before you disable any Windows services, it's important to consider carefully what each does and whether you will need them.
For example, the WLAN Autoconfig Windows service supports the normal operation of a wireless network card, and runs automatically on systems that rely on wireless connections, such as a laptop. However, if you know you won't need to access the internet using a wireless connection, you can disable it using the steps above.
Get the ITPro. daily newsletter
Receive our latest news, industry updates, featured resources and more. Sign up today to receive our FREE report on AI cyber crime & security - newly updated for 2024.
You could also disable the Windows Mobile Hotspot service, for the same reasons.
Another service you might consider disabling is Indexing Service or Windows Search. These functions index your hard drive as a background task, which is meant to make it faster and easier to search your hard drive when you ultimately decide to do so. Although convenient, this constant activity on a hard drive can be taxing on older machines.
Other Windows 10 services to disable to speed up the OS:
| AVCTP Service | can be disabled if you don't use Bluetooth devices |
| Bluetooth Support Service | same as the above |
| Connected User Experiences and Telemetry | handles the feedback data sent to Microsoft, and can be safely disabled |
| Diagnostic Tracking Service | same as the above |
| Downloaded Maps Manager | can safely be disabled if you don't use the Bing Maps app |
| Infrared Monitor Service | only needed if you use infrared devices to transfer data |
| Print Spooler | if you don't use physical printers, you can safely disable this |
| Parental Control | obvious one to disable if you don't share your PC with children |
| Windows Image Acquisition | handles physical scanning devices |
| Windows Camera Frame Server | can be disabled if you don't use a webcam |
| Windows Insider Service | only needed if you are part of the Windows Insider Program |
2. Disable startup programs in Windows 10
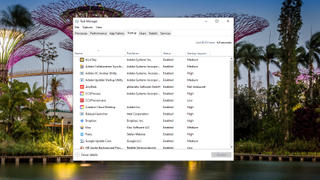
Virtually every version of Windows allows you to disable startup items, and Windows 10 is no exception. Stopping some programs from starting up will speed up the OS.
To find this option:
- Right click the Taskbar
- Click Task Manager
- Click 'More Details'
- Click the Startup tab
- Find a program you don't want to load at startup
- Right click and click Disable
3. Make the Windows 10 Start menu and other windows zippier
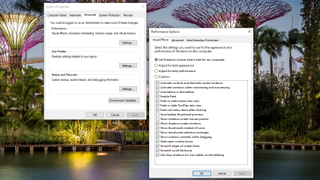
Although Microsoft's new snazzy Windows 10 Start Menu is a breath of fresh air compared to the older version, bringing it up to speed with the likes of Apple's sleek interface, it can be a little slow to pop up if your machine isn't brand spanking new. This is because it takes more processing power to make it appear and if your machine doesn't have a newer chip, you might be waiting a few seconds for it to react.
However, it's straightforward to shut down some of the animations to make them show up without the wait.
- Click the Start Menu
- Type sysdm.cpl and hit Enter
- Click the Advanced tab
- Under the Performance field, click Settings
- Untick the 'Animate Windows when minimising and maximising' option
- Click Apply
Not only should this add some speed to the Start menu opening, but also other windows that appear on your desktop. You can also disable all the visual effects throughout Windows 10 to speed up everything. Just click on the tick boxes to turn them off individually or choose the "Adjust for best performance" option to optimise the performance for your machine.
4. Make logging into Windows 10 quicker
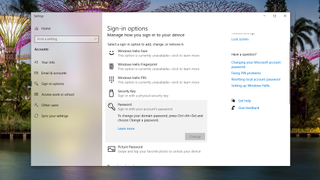
We cannot stress the importance of security and, most of the time, a strong password or two-factor authentication are an absolute must. However, when your old laptop is already taking forever to start up, logging in can make the process even lengthier.
Although we wouldn’t normally advise it, you might want to consider skipping this process by disabling password authentication on your Windows 10 device, and replacing it with something quicker, such as facial recognition or a simple picture check.
To do this:
- Click the Start Menu
- Type Sign in options into the search field and hit Enter
- Click on the type of authentication check you want
- Click Setup / Add and follow the prompt
One way of interpreting this advice is to only apply it to stationary devices which never leave your home, such as a desktop PC. However, when it comes to tablets and laptops, you might want to skip this one.
5. Make shutting down Windows 10 faster
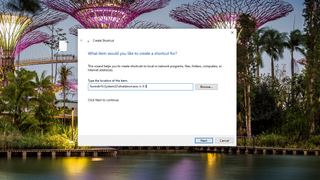
If you find the process of shutting down your system a tad laborious after a hard day's work, there is a way to simplify it. To speed this up you can use a shortcut: Simply right click anywhere on a free part of the desktop then click New > Shortcut. In the Location field, type in the following.
- Right click an empty space on your Desktop
- Click New
- Click Shortcut
- Type %windir%\System32\shutdown.exe /s /t 0
- Click Next to finish
Now each time you click on that shortcut, your PC will immediately shut down. Be careful though, as this will happen without a confirmation check.
6. Remove bloatware in Windows 10
No one likes bloatware (except PC manufacturers) but it does mean your system is slightly cheaper as a result. These are programs such as disc burning software, backup tools from the manufacturer, or other utilities that you don't necessarily need.
The good news is that you can, in most cases, remove these programs entirely from your system, freeing up a bit of hard drive space and potentially removing unwanted background processes.
- Click the Start Menu
- Type add or remove programs into the search bar and hit Enter
- Scroll through the list until you see a program you do not want (it's worth double-checking each program online to make sure it can be safely removed)
- Click the three dots and click uninstall
There will be lots of services and apps in this list that can be ignored, but removing any pre-installed apps from recognisable brands are always a good place to start.
7. Turn on Windows 10 fast-startup
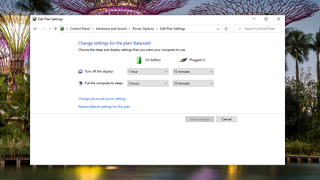
With Windows 10 there is a new "hybrid" startup mode that should cut down on bootup times. It does this by putting the PC into hibernation instead of fully shutting down.
To enable this:
- Click the Start Menu
- Type Control Panel into the search and hit Enter
- From here, click Hardware and Sound
- Under Power Options, click 'Change what the power buttons do'
- Click 'Change settings that are currently unavailable'
- Click the box next to 'Turn on fast startup'
- Click Save Changes
8. Clean up your Windows 10 disk
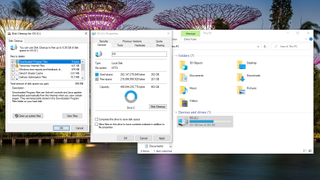
When you’re looking to get rid of files you don’t need, Windows 10 has a Disk Cleanup tool that is very useful to accomplish this. To locate this:
- Click the Start Menu
- Find and open the File Explorer
- Right click the Local Disk C:
- Click Properties
- Under the General tab, click the Disk Cleanup button
- Select 'unnecessary files'
- Click Ok
If you are more of an experienced user, you can also choose to ‘Clean up system files’ to eliminate a greater quantity of files. Once you’ve done this, you can then proceed to defragment your hard drive on Windows 10.
9. Defragment the hard drive on Windows 10
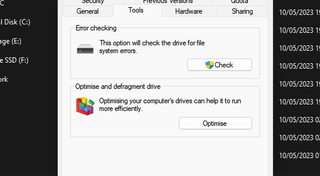
One of the simplest ways to improve your computer’s speed is to defragment the hard drive. The process essentially brings together the different sections of your files into the smallest possible sequential area on your disk. Read/write heads are more rapid at completing requests since they have to travel smaller distances. To do this:
- Click the Start Menu
- Open the File Explorer
- Right click Local Disk C:
- Click Properties
- Under the Tools tab, click 'Optimize and defragment drive'
- Follow the on-screen prompts
Regularly defragmenting is a great way of making sure your PC stays healthy, for users with physical HDDs. To carry this out on your hard drive, begin by clicking the Start button and selecting File Explorer. From here, right-click Local Disk C: and find Properties. You should see the Tools tab which, once you’ve entered it, you can click on ‘Optimize and Defragment Drive.’
Important note: This doesn’t apply to solid-state drives, only physical, platter-based ones. Fragmentation won’t really have an affect on performance of solid-state drives (SSDs), since they store data in a specific way.
10. Migrate Windows 10 to an SSD
Moving your operating system or your whole hard drive onto a brand-new SSD is considered to be the best, but most disruptive, way of improving your Windows 10 speed.
In the most basic terms, SSDs are like a standard USB stick, except they’re just larger and more sophisticated. SSDs don’t have any moving parts, in contrast to hard drives which possess a moving arm to read and write onto a physical disk.
It’s the norm for many PC users to have both a hard drive and SSD running at the same time, with the much faster hardware being the place where the operating system is running. Despite this, it’s fairly cost-effective to move the whole of your data, as well as your software, onto a SSD thanks to falling prices and larger SSD capacities on the market.
Most operating systems, including Windows 10, perform very well on a SSD, helping to reduce boot times and load times to seconds. It’s worth taking a look at the spec sheet if you’re purchasing a new PC or laptop, and make sure they come with a SSD installed.
Although the process is a little complicated, it’s worth knowing that Windows 10 is able to be migrated to a SSD on an existing system. Take a look at our guide on how to move Windows 10 from an HDD to an SSD, where you can learn tips on how to make sure your data isn’t lost in the process.
Rene Millman is a freelance writer and broadcaster who covers cybersecurity, AI, IoT, and the cloud. He also works as a contributing analyst at GigaOm and has previously worked as an analyst for Gartner covering the infrastructure market. He has made numerous television appearances to give his views and expertise on technology trends and companies that affect and shape our lives. You can follow Rene Millman on Twitter.


