There's no excuse not to encrypt your hard drive. What with the proliferation of data breaches, cyberattacks and hacker activity, disk-level encryption is becoming a key component of any effective cyber security defense, alongside biometric and two-factor authentication.
This is doubly true if your PC is being used as a work device. No one wants their private and personal information in the hands of hackers, but think about how much worse the consequences could be if they get their hands on an unencrypted drive containing mission-critical documents or sensitive data.
Don't think that just a password is enough to protect you either; determined thieves will find a way to bypass that lock screen. Even if you've added extra biometric protection via Windows Hello, they can use the brute-force method of removing the hard disk. If you haven't encrypted it, it's child's play to read the data.
Ways to encrypt your hard disk
There are many ways to encrypt key documents, including open-source projects like VeraCrypt (a successor to TrueCrypt). This lets you select individual files and folders to encrypt, or the entire hard disk, and is a good choice if you're running Windows 10 Home.
If your laptop runs Windows 10 Pro, Enterprise or Education, however, then we recommend you choose Microsoft's BitLocker and that's what this guide focuses on.
If you're not sure which version of Windows you're running, press the Windows key and type "System". The top option you're shown in the search results should be "System", so select that and look at the Windows edition near the top.
BitLocker works best if you have a chip called a trusted platform module (TPM) built into your laptop. This contains the cryptographic keys the encryption relies on, and sits separately to the hard disk if someone rips out your hard disk, they won't be able to decrypt its contents without the TPM.
Most business laptops will include a TPM, so for this guide we'll assume yours does. If this isn't the case and you'll find out during the process below then follow the instructions on this Microsoft page for how to enable BitLocker without a compatible TPM (roughly two-thirds down the page). This page also explains how to create a partition if your laptop doesn't already have one set aside for encryption purposes.
Step-by-step guide to BitLocker
You'll need to be logged in as an administrator for the steps below to work. Also note that you might want to print off the password (you can save it to an external drive as well), so connecting a printer beforehand is a good idea.
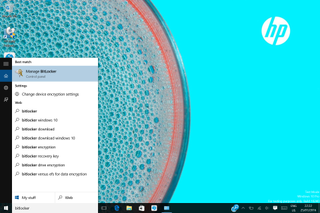
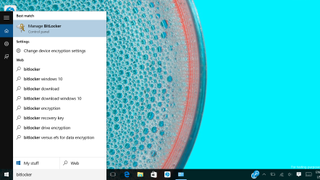
Step 1: Press the Windows key and type "BitLocker". Select "Manage BitLocker". If this option doesn't appear, bad news: either you've mis-spelt BitLocker or you aren't running a version of Windows that supports it.
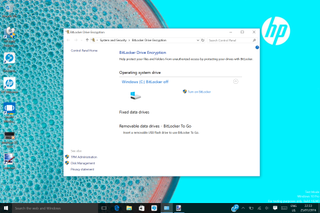
Step 2: If your TPM isn't "initialized" that is, activated and set up with the root encryption keys then you'll see a prompt to do this. Most business machines with a TPM will already be initialized, however, so your next step should be simple: click on "Turn on BitLocker". If the User Account Control message appears, press Continue.
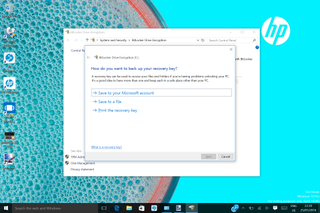
Step 3: The BitLocker wizard will then kick in, with the first prompt asking where you want to back up your recovery key. We recommend having at least two copies one printed out and filed safely away, the other saved to a file on an external drive. Indeed, the wizard won't allow you to save the key to the drive you're encrypting. Once you've saved your recovery key, and printed it, press Next.
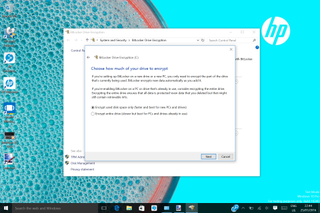
Step 4: You can choose to encrypt the full disk or "used disk space only". The latter option is quicker, and recommended for new PCs, but if you're encrypting a machine that's been used for a while then you should choose the full disk option. That means that all your existing data will be encrypted, including any deleted files. Whichever option you choose, any new data will be automatically encrypted. Take your pick and click Next.

Step 5: Before the process starts, you're given one last safety prompt to make sure you want to encrypt and that this is a good time to do so. We recommend ticking the check box to run a "BitLocker system check", which makes sure the recovery and encryption files are ready, and then click "Start encrypting".
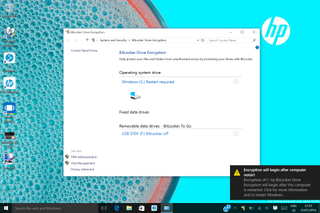
Step 6: Even now you have one last chance to save any work, because encryption won't begin until you restart the system. Save any open docs then click on the message that appears in the bottom-right of the screen (or reboot manually).
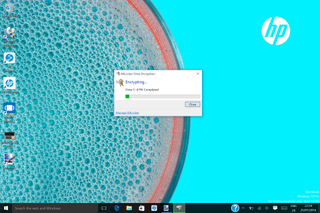
Step 7: On reboot, everything will appear to be as normal except there's an icon sitting in your System Tray showing a lock over a drive. Double-click on this and you can see how quickly your drive is encrypting. Whilst every system and drive is different, the process took around an hour for our system with a 256GB SSD and 1.1GHz Intel Core m5 processor.
A word on self-encrypting hard drives
BitLocker is great, but if you're on the point of buying a new laptop whether for yourself or, if you're in charge of IT procurement, a fleet then you should seriously consider a self-encrypting drive (as used in many of HP's EliteBook ranges).
With a self-encrypting drive, the key is built into the electronics of the drive itself, so there's no possible way for anyone to hack into it. The only way to access the data on that laptop is to enter the correct password.
That may be overkill for some, but if your company deals with highly secure data then self-encrypting drives are an option well worth exploring.
Get the ITPro. daily newsletter
Receive our latest news, industry updates, featured resources and more. Sign up today to receive our FREE report on AI cyber crime & security - newly updated for 2024.
ITPro is a global business technology website providing the latest news, analysis, and business insight for IT decision-makers. Whether it's cyber security, cloud computing, IT infrastructure, or business strategy, we aim to equip leaders with the data they need to make informed IT investments.
For regular updates delivered to your inbox and social feeds, be sure to sign up to our daily newsletter and follow on us LinkedIn and Twitter.


